Step 1:
Overhangs help:
- Protect walls
- Reduce mud
- Improve rain drainage
- Increase shade
- Improve airflow
Most coops benefit from 8–12 inch overhangs.
Step 2: Choose Roof Pitch
Roof pitch controls drainage.
Steeper roofs improve:
- Snow runoff
- Rain drainage
- Ventilation
Popular beginner pitches include:
- 3:12
- 4:12
- 5:12
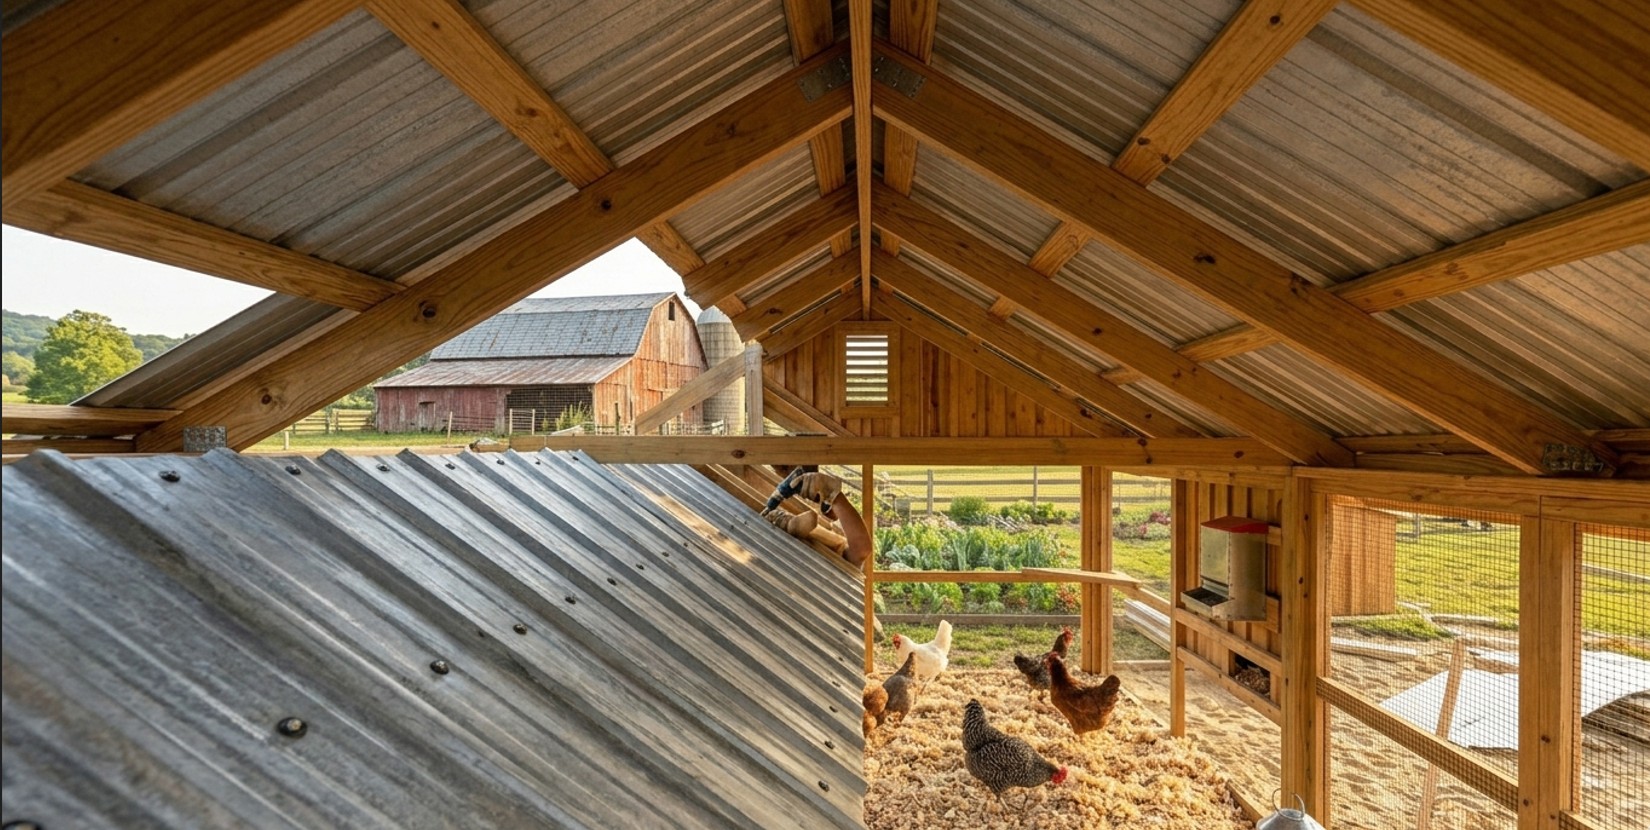
Step 3: Build the Roof Frame
The roof frame supports the entire roofing system.
Use pressure-treated lumber for durability.
Common Lumber Sizes
- 2×4
- 2×6
Main Roof Frame Parts
- Rafters
- Ridge board
- Cross braces
- Roof supports
Ensure the frame feels completely stable before adding roofing panels.
Step 4: Install Rafters
Rafters create roof support structure.
Recommended Spacing
- 16 inches apart
- 24 inches apart
Closer spacing increases strength.
Step 5: Install Roof Decking
Roof decking creates a flat surface underneath roofing materials.
Plywood is commonly used.
Best Plywood Thickness
- 1/2 inch
- 5/8 inch
Secure decking tightly using screws.
Step 6: Add Waterproof Underlayment
Underlayment protects against leaks.
Roofing felt is commonly used.
This moisture barrier dramatically improves durability.
Step 7: Install Roofing Material
Now install the final roofing layer.
Installing Metal Roofing
Metal roofing is very popular for DIY coops.
Installation Tips
- Overlap panels correctly
- Use rubber washer screws
- Seal joints carefully
- Start from bottom edge
Installing Asphalt Shingles
Steps include:
- Starter strip
- Shingle rows
- Proper overlap
- Secure nailing
Installing PVC Panels
PVC roofing is lightweight and easy to handle.
Avoid overtightening screws.
Step 8: Add Roof Ventilation
Ventilation is critical for healthy chickens.
Without airflow, moisture and ammonia quickly build up.
Best Ventilation Methods
Ridge Vents
Allow hot air to escape naturally.
Side Vents
Improve cross airflow.
Gable Vents
Excellent for large coops.
Always cover vents using hardware cloth.
Step 9: Waterproof the Roof
Even small leaks can create major problems.
Waterproofing Tips
- Seal screw holes
- Use flashing
- Add rain gutters
- Use waterproof tape
- Inspect seams carefully
Step 10: Test the Roof
Spray water over the roof.
Check inside carefully for leaks.
Fix problems immediately.
Best DIY Roof for Hot Climates
Heat management matters in southern regions.
Recommended Features
- Reflective metal roofing
- Roof vents
- Shade systems
- White roofing colors
- Solar fans
These reduce coop temperatures significantly.
Best DIY Roof for Cold Climates
Cold regions require stronger insulation and snow handling.
Recommended Features
- Steep roof pitch
- Strong rafters
- Insulation layers
- Waterproof barriers
Ventilation remains important even during winter.
Chicken Coop Roof Insulation Ideas
Insulation helps stabilize coop temperatures.
Popular Insulation Materials
- Foam board
- Reflective insulation
- Fiberglass batts
Protect insulation from moisture whenever possible.
Cheap DIY Chicken Coop Roof Ideas
Building on a budget is completely possible.
Budget Roofing Options
- Recycled metal sheets
- PVC panels
- Pallet wood
- Salvaged lumber
- Used shingles
Many excellent backyard coops are built using recycled materials.
Solar Roof Ideas for Chicken Coops
- Power fans
- Run lights
- Improve ventilation
- Reduce electricity costs
Small solar systems work very well for backyard coops.
Predator-Proof Roof Tips
Predators often attack from above.
Protect your chickens using:
- Strong roofing panels
- Reinforced roof edges
- Hardware cloth vents
- Secure fasteners
Raccoons are especially dangerous climbers.
Common DIY Roofing Mistakes
1. Poor Ventilation
Bad airflow creates unhealthy coop conditions quickly.
2. Weak Roof Framing
Weak rafters may fail during storms or snow.
3. Flat Roof Drainage Problems
Standing water increases leak risk.
4. Cheap Fasteners
Low-quality screws rust quickly outdoors.
5. No Waterproofing
Even strong roofing materials require proper sealing.
DIY Chicken Coop Roof Maintenance
Routine maintenance increases roof lifespan dramatically.
Monthly Maintenance
- Inspect screws
- Remove debris
- Check leaks
- Clean gutters
Seasonal Maintenance
- Inspect after storms
- Check snow damage
- Reapply sealant if needed
How Long Does a DIY Chicken Coop Roof Last?
Roof lifespan depends on materials.
Average Lifespans
- Metal roofing: 30–50 years
- Asphalt shingles: 15–25 years
- PVC panels: 10–20 years
Regular maintenance greatly extends durability.
Best Roof Color for Chicken Coops
Color affects temperature.
Best Colors for Hot Climates
- White
- Silver
- Light gray
These reflect sunlight better.
Best Colors for Cold Climates
Darker colors absorb more heat.
How Much Does a DIY Chicken Coop Roof Cost?
Costs vary depending on size and materials.
Small Coop Roof Costs
- Budget build: $100–$300
- Mid-range build: $300–$700
- Premium roofing: $700+
Using reclaimed materials lowers costs significantly.
Beginner DIY Roofing Tips
If you are new to construction:
- Keep designs simple
- Use slanted roofs
- Buy quality screws
- Prioritize waterproofing
- Focus on ventilation
Simple designs usually perform best.
Frequently Asked Questions
What is the easiest chicken coop roof to build?
A slanted lean-to roof is usually easiest for beginners.
Is metal roofing safe for chicken coops?
Yes. Metal roofing is durable, waterproof, and widely used.
Do chicken coops need roof ventilation?
Yes. Proper ventilation is critical for healthy chickens.
What is the cheapest chicken coop roof?
PVC panels and recycled metal sheets are among the cheapest options.
Should chicken coop roofs be insulated?
Insulation helps in extreme climates, especially cold regions.
Final Verdict
Building a DIY chicken coop roof is one of the best investments you can make for your backyard flock.
A strong roof improves:
- Chicken health
- Moisture control
- Temperature management
- Predator protection
- Long-term coop durability
For most backyard chicken keepers, a slanted metal roof provides the best combination of:
- Affordability
- Easy installation
- Weather resistance
- Low maintenance
With proper planning, ventilation, waterproofing, and quality materials, you can build a durable chicken coop roof that protects your flock for many years while keeping your coop cleaner, safer, and more efficient year-round.